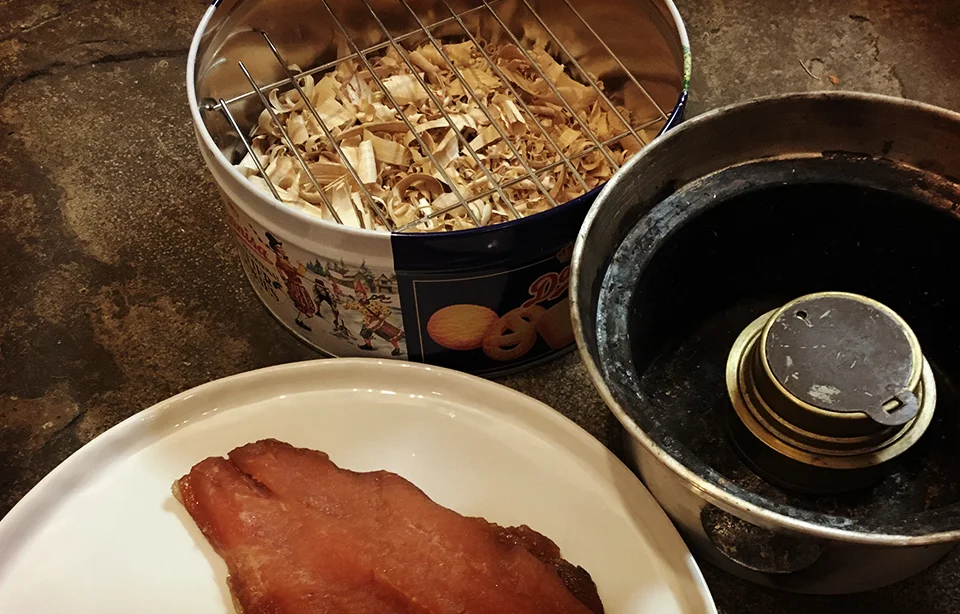
Assembling the pieces
After a recent fishing trip I found myself furnished with a rather fine rainbow trout; it didn't feel like a whole-cooked fish kind of night so I thought it was the perfect time to have a crack at smoking. I managed to cobble together a smoker from things I had lying around and made a recipe inspired by the Whole Larder Love book and various episodes of River Cottage. It was surprisingly easy and I'm very happy to report that the results were spectacular.
Building Your Smoker
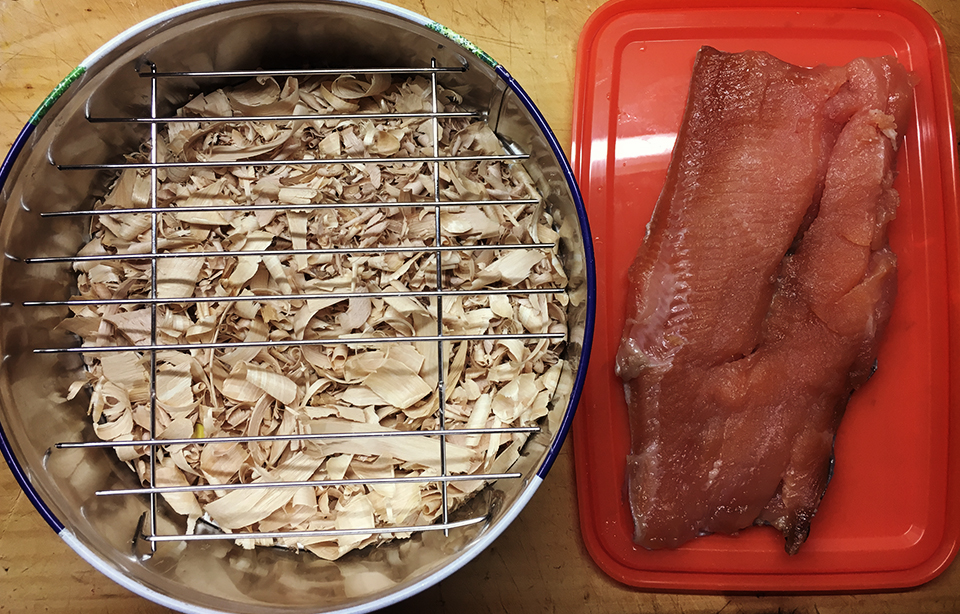
- For the main chamber of the smoker I used the tin from some Royal Dansk Danish Butter Cookies, the kind you always find yourself with but can never quite remember where they came from. I pierced holes in the lid to let the smoke out.
- For the smoking rack I used a baker's cooling rack and cut it into a circle the same diameter as the tin. I left a couple of centimeters on a few of the horizontal bars and bent them over so that the rack sat away from the bottom of the tin.
- I put a couple of handfuls of shavings into the bottom of the tin. There seems to be a lot of discussion about the best wood to use for this, but I had a pile left over from carving spoons which I used, it was mainly birch.
- For a heat source I had the burner from my Trangia. You can use a gas hob or stove top but I didn't want to stink the house out with smoke so a portable option was preferable.
Ready
Cooking Method
- Firstly I descaled, cleaned and filleted the trout.
- I made a rub that was 2 parts salt and 1 part brown sugar and gave the fish an all over coating. This was left in a sealed Tupperware container overnight in the fridge.
- The next evening I washed the fish, removing the excess rub and patted it dry.
- I placed the fillet inside the tin skin side down, closed the lid and lit the burner.
- After a couple of minutes smoke was billowing out of the holes in the lid. I gave each fillet about 10-12 minutes which seemed perfect.
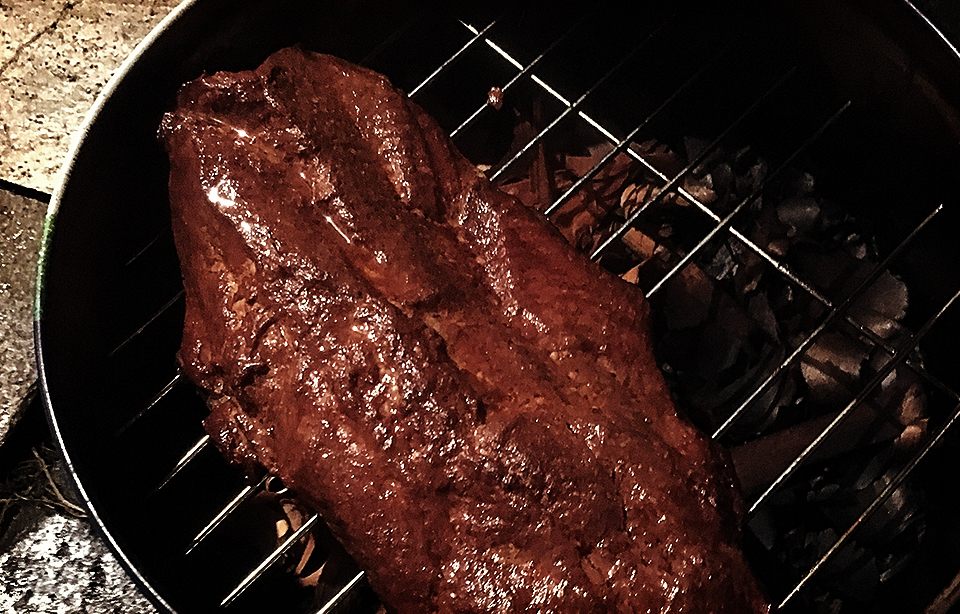
The finished piece.
The fish was moist and tender, and it crumbled perfectly. It had a deep-infused smokiness and that salty smoked-fish tang. It was so morish I wolfed the first fillet down immediately. I saved the second for breakfast and had it on an English muffin with a poached egg. Perfect.